Home » Plumbing
Category Archives: Plumbing
How to Tell If Your Water Heater Needs Repair
Water heaters require regular maintenance to keep them working correctly. This includes flushing and draining the tank at least once a year and replacing the anode rod, also known as a sacrificial rod, every three years.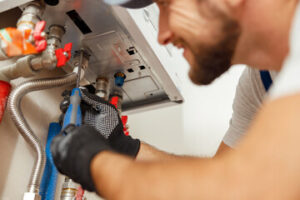
Some repairs are best left to professionals, especially those involving gas lines. Attempting DIY repairs can lead to fires or explosions and pose significant risks for you and your family. Contact Denver Water Heater Repair for professional help.
A leaking water heater can cause significant damage if left unchecked. Fortunately, there are several things you can check yourself before calling in a professional. This way, you’ll have a better idea of what the problem might be and how much the repair is going to cost.
If you notice a pool of water near your water heater, the first thing to do is shut off gas/electricity and your cold water supply to the tank. This will stop further damage and prevent a flood in your home if the leak is caused by the tank itself.
Next, check the inlet and outlet connections on your water heater. These can corrode or loosen over time, causing leaks. You can tighten these with a pipe wrench. If you’re unable to fix them, it might be time for a replacement.
Another common cause of leaks is the temperature and pressure relief valve (T&P). This valve is designed to release excess pressure within your water heater, but can become faulty. If this is the case, it’s important to replace the T&P valve immediately.
Leaking from the top of your water heater is usually a sign that your tank is beginning to crack or rust. This can be caused by sediment buildup or if the water is too hot. Draining and cleaning your tank periodically and regularly flushing the drain valve can help reduce this problem.
If you have a gas water heater, it’s also important to have your anode rod replaced when needed. This sacrificial component attracts corrosive materials away from the tank itself, preventing corrosion and increasing your water heater’s lifespan.
If you cannot find the source of your leak, it’s a good idea to call in a plumber. They will be able to inspect your water heater and determine if it needs replacing or just requires some maintenance. Having your water heater repaired promptly can prevent more expensive problems in the future. Contact a reliable plumber today to schedule your appointment. The sooner you call, the sooner your water heater will be fixed and back to working properly.
Temperature Issues
If your water heater’s temperature is too high, it may be due to mineral or sediment buildup. This can be prevented with regular cleaning and descaling. If the problem persists, it may be time to replace your unit. Other causes include a faulty thermostat or temperature sensor, or the pilot light could be blown out. These are all repairable by a professional.
If the water heater is gas, it can also be a sign of a faulty pilot or thermocouple. This should be handled by a professional since there is the risk of carbon monoxide poisoning.
A water heater that makes a loud whine or rumbling noises may be boiling sediment in the bottom of the unit. This can be fixed by shutting off the power to the tank, opening the temperature pressure relief valve on the top and draining it. Once the sediment is drained, it’s a good idea to flush the tank every year or so.
Lukewarm water coming from your shower or tub is a sign of low hot water temperature. This can be caused by a faulty thermostat, sediment or a cross-connection. It’s important to get the issue fixed quickly, so call us right away!
You can sometimes fix a low or inconsistent water temperature by replacing the dip tube. This pipe extends into the tank and draws cold water in at the top, while drawing hot water out of the bottom (since hot water rises). It can break off, corrode, or develop holes at any point along its length, resulting in lukewarm or inconsistent temperatures. Alternatively, you can have a professional install an anode rod to help prevent rust and corrosion on the tank itself.
The temperature controls on a gas unit are hidden behind a panel fastened to the tank body with 2-4 screws. Using a screwdriver, you can remove these, then carefully peel back any insulation that’s blocking the access panel. Be careful not to rip or tear it, as the insulation helps keep your unit running efficiently. Then, you can use a multi-meter set to the ohms setting to check continuity on the lower heating element. You should measure around 13 ohms of resistance.
Banging Noises
Your water heater is one of the most important appliances in your home. Because of its heavy workload, it’s not uncommon for it to make some noise, but if you hear anything new or strange, don’t ignore it! Identifying the source of these sounds can help you determine whether or not your water heater needs repair.
Banging or rumbling sounds often point to sediment build-up in the water tank. The sound is created when steam bubbles encounter the layer of mineral deposits and sediment in the tank, causing them to explode. You can help reduce this risk by draining the tank and removing the sediment. This is something that should be done at least once per year to help prevent sediment build-up.
Another common sound you may notice coming from your water heater is a ticking or tapping sound. This is a normal result of pressure fluctuations throughout your plumbing system, and it’s often caused by the inlet and outlet nipples creating what’s known as a heat trap. This can also cause clogging, but a plumber can easily replace these nipples to remove the sound.
A hissing or sizzling sound is a sign that your water heater is overheating. Overheating occurs when the water in your water heater starts to evaporate, and it can lead to significant damage to your home’s plumbing. You can reduce the risk of overheating by resetting the pilot light, draining the water, and installing a water softener.
You may also notice a rusty smell near your water heater, or a rotten egg taste in your home’s hot water. These are signs of a leak or gas leak, and it’s imperative to turn off the water supply and contact a professional immediately. They will inspect your water heater and make any necessary repairs. In addition to repairing leaks, the professionals at Stephens Plumbing can also install an expansion tank to manage thermal expansion and avoid leaking and rotten eggs in the future. This is an affordable solution that should be considered for every water heater. They can also schedule annual maintenance services to keep your water heater in top condition.
Water Discoloration
A water heater tank can start to corrode over time, leading to brown or orange colored water. A professional plumber will be able to identify the cause of this, and may recommend that you install a Corro-Protec powered anode rod to prevent corrosion and other damage to your water heater. If the discoloration is occurring at all faucets in your home, including toilets, it’s likely a problem with your water supply lines, and not your water heater.
Natural minerals that are heavier than water sink to the bottom of water supply lines, and are often stirred up when there’s a sudden change in flow or demand. This can temporarily discolor your water, but it shouldn’t pose a health risk and should clear up quickly. If you’re experiencing this issue, check to see if any construction or other aboveground activities are happening in your area, and report the discoloration to your municipality’s water quality line.
If you’re noticing white or tan particles in your water, it’s typically calcium or magnesium deposits. These can clog pipes and drains over time, so you’ll want to have your plumbing system flushed and cleaned by a professional plumber.
A bacterial infection known as Serratia marcescens can also cause brown or yellow discolored water. It’s usually caused by aging iron or galvanized pipe systems, and can lead to staining of fixtures and laundry, as well as a metallic taste. If you notice this, run your hot and cold taps for one to two minutes to bring in fresh, uncontaminated water.
Older pipes in older homes are sometimes made from galvanized metal, which can begin to rust and corrode. These can release rust particles into the water supply, which can then discolor the water that comes out of your faucets. If this is a regular issue, you’ll need to replace your water piping, which can be an extensive job best left to a licensed Maryland plumber. You’ll also need to ensure that your water softener is working properly, and is not releasing millions of tiny spherical microbeads into the water supply.
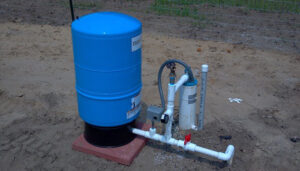
Well Pump Plumbing: Signs of a Well Pump That Needs Repair
Well pump plumbing enables homeowners to get fresh, clean water from a deep underground reservoir. The main components of well pump systems are the pressure tank, submersible pumps, and piping from the well to the home.
Pumping well systems need check valves to prevent backflow of water in the piping when the pump turns off. This can lead to low water pressure and water hammer.
Submersible pumps work by drawing water into the pump body through a suction grid fitted at the bottom of the well casing, then pushing it out via a delivery connection. This delivery connection has a hose or pipe system attached to it, which carries the water away from the pump into a discharge line. This type of well pump is typically used to transport wastewater, although some models can also be adapted to push clean water, which makes them an efficient choice for drain systems, pools, and utilities.
Choosing the right pump depends on your well’s size and needs. The bigger your home, the higher the output you’ll need from the pump. An average home requires 8 to 12 gallons per minute, and most pumps are rated for this capacity. You’ll also want to consider the amount of water your household uses, including dishwashers, washing machines, and refrigerators.
Another important consideration is the location of your well. Wells with shallow casings may require a lower output rate, while those with deeper casings can benefit from a higher-output model. In either case, it’s important to get your well sized properly before installing a new pump.
In addition to considering the power requirements of your pump, you should check its delivery head. This is the height that the pump can raise water above the surface, and it varies between models. One model might have a delivery head of eight meters, while another might be able to lift water up to five meters.
If your well piping includes a check valve or foot valve, losing prime will not be as much of a problem as it would be with a jet pump, which must remain above ground to function. However, you’ll still need to watch out for a loss of building pressure between well pump cycles.
When it comes to well pump plumbing, the benefits of using a submersible pump are many. These pumps are versatile and reliable, and they can help you save money on your energy bills. However, if you’re interested in having this type of pump installed, it’s best to work with a plumber who has experience with this type of service.
Low energy consumption
In addition to the cost of a well pump and installation, homeowners must also consider energy consumption. Typically, well pumps operate at high pressure and consume a great deal of energy. Fortunately, there are ways to lower this energy use. One way is to install a pressure tank system that can increase the water pressure in your home and allow you to use the well pump more efficiently. Another way is to remove devices from your pump system that waste electricity. These include specialty valves designed to prevent the well pump from turning off and on frequently or quickly. While these valves do have a useful purpose, they waste many gallons of water and cause excess heat to build up inside the pump motor.
Well pumps must be sized correctly for your needs. An undersized pump will cause the system to cycle off and on constantly, consuming large amounts of electricity and causing wear on the pump motor. An oversized pump, on the other hand, will consume a lot of power for little water use. The best way to determine the correct pump size for your well is to calculate how many gallons per minute (GPM) you need. An average household with three or four bedrooms will need 8 to 12 GPM of water for daily activities.
Using a submersible pump will also reduce your energy costs. These pumps are better at pushing than pulling, which means that they use less energy than a surface pump.
When selecting a submersible pump, be sure to select the right size for your home. A large house will require a larger pump than a small house. Also, be sure to choose a pump that is compatible with your home’s plumbing system.
Durable Design
A well pump is a vital component of your home’s water system. Like all machines, it needs to be cared for in order to keep functioning properly. When a problem arises with your well pump plumbing, it can lead to an insufficient water supply and costly repairs for your home. Here are some signs of a well pump that’s in need of maintenance or repair:
Low water pressure
Low water pressure may be the most obvious sign that your well pump is experiencing a problem. If the water pressure in your house is lower than normal, it’s a good idea to call a professional to inspect the well pump and pressure tank for any issues that could be causing this problem.
Noises Coming From the Well Pump
A noisy well pump is another sure sign that something is wrong. If you notice a grinding, whining, or squealing sound coming from your well pump, it’s important to have a professional examine the problem right away to prevent serious damage.
Water-Loss Alarms
Water loss from the well system can be caused by many different things, including a faulty pressure tank or a broken water pump. If you notice that your water loss is escalating, it’s important to contact a plumber for repairs right away.
If your well pump is overworking, it can also cause the motor to wear out. This can lead to high energy bills and expensive repairs. To avoid this, it’s important to check the pump regularly and replace it before it wears out completely.
Durable Design
The well pump is a durable and reliable choice for any residential or commercial application. The stainless steel housing is designed to withstand harsh conditions, and the back pullout feature makes it easy to service without disturbing piping. The impellers, diffusers, and bearing spiders are made of FDA-compliant glass-filled engineered plastics that are corrosion-resistant. The time-proven captured stack design features sand notches that keep sand flowing through the impeller stack for superior sand handling capability.
The hex shaft design is precision machined with tight tolerances to ensure smooth operation and superior durability. A sleeve protects the motor bearing from excessive abrasion, and the sand hopper eliminates pump shaft wear in sandy applications.
Easy Installation
A well pump is a powerful device that is used to extract water from underground. In a household setting, it is commonly placed in the basement and connected to the household plumbing. In addition to supplying household water, this type of pump also helps with waste disposal. To ensure safety, there are certain steps to take when working with a well pump.
To begin with, it is important to understand how a well pump works. This will help you pick the best well pump for your house. The well pump is a device that moves water through the house plumbing system at high pressure. The pumped water first enters a storage tank, where it is stored until needed. In most cases, the water is pumped into the household plumbing at peak usage times, such as when someone uses the sink or toilet.
The pumped water is pulled from the well at a rate of about a gallon per minute. The pumped water then mixes with the existing water in the household plumbing at the outlet point. During installation, a well pump must be properly configured to provide the highest performance. This will often save you money and hassle down the road.
Before starting to install your well pump, you should always familiarize yourself with the owner’s manual. This will contain important safety precautions and wiring diagrams that must be followed. The manual will also list the tools required for assembly, proper grounding instructions, and troubleshooting items.
The first step in the installation process is to turn off any power sources for the well pump. Then, you must remove the old pump from the well. This will typically require the use of a hydraulic lift or a ladder to access the top of the well casing. Once the old pump is removed, you can inspect the well and clean it. Be sure to check for any sand or debris that may have been left behind from the drilling.
Once the well is cleaned, it is time to install the new pump. Once you have completed the installation, you will need to connect the motor leads and test them for proper connection. You will want to make sure that the frequency and voltage match the motor nameplate frequency and voltage. You will also need to attach the copper ground wire and submerge the spliced wires underwater to test them.